


This was one of my students favorite art/writing activity all year! We spent time reading a whole bunch of Eric Carle’s books. For a complete list of his books, click here.
Then I told them that we would be making our own Eric Carle style animal to write a story about.
Materials: Small pieces of carpet, tooth brushes, sponges, paint brushes, rollers, (anything can make a cool texture when painting), smocks, containers for paint, colored and white tissue paper, cardboard, paint (any color), glue, water, scissors, chalk.

Day One:
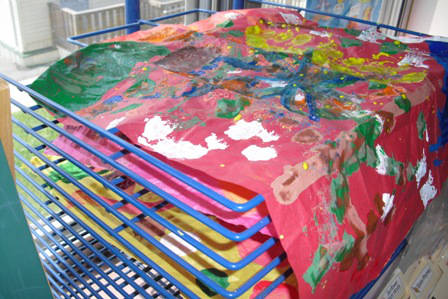
Give each student a piece of large colored or white tissue paper. I tell them that we are making a design on each tissue paper to share with the other students in the class. This way the students can use a lot of dif ferent colors and designs on the following days. Give each student some paint and different materials to make texture and design. I show them how to splatter paint on the tissue paper and how to sponge on paint so that you can see the cool holes. I also had them use tooth brushes, paint roll
 s, and regular paint brushes. Once they finished they went back to their seats with a scrap piece of paper and draw out what Eric Carle style animal they wanted to create. I then placed the tissue paper in the drying rake for the next day.
Day Two:
Use a few cereal boxes to cut out some important shapes for the students to use (large circle, small circle, ovals, wing shapes, small rectangle, and etc.)

After the tissue paper dried, I cut the big pieces into four small squares and mixed them up. This way you will not have the problem of students not wanting anybody to use the tissue paper they made the day prior. I reminded them that anybody can use ANY piece of tissue paper made. I then show them the cardboard shape pieces that they can use to trace a shape with chalk and cut out. I give them a little time to start and then I give them a baggie to put all their pieces in so far.
Day Three:
The students then get their sketch and pieces back out and start to place their pieces together to make an animal picture. I made a caterpillar to show them as an example. I then have them use a LITTLE bit of glue to place all their pieces together on a large sheet of project poster paper. Then they can use crayons to draw on a background (if they are really good, they can make a background with the tissue paper).
Day Four:
Mix a couple of containers with glue and water. Have the students paint the glue mixture over the picture. Tell them to be very careful. Let it dry and then the writing begins!
I had some very creative students come up with some awesome new Eric Carle creatures! This whole process got them all very excited about writing about their animal!
As an extension, have the students go to the computer lab and try to make a background picture or another Eric Carle animal on the computer program Pixie. You could also use MSPaint as well.